The Student Database app (SDB) stores every student along with a record of everything they have ever done.
This data is updated in real-time as the student opens emails, completes web forms, enquires, books onto events, applies, uploads documents, changes their mobile, and so on. Learn more about Student Database.
Student CRM is the leading-edge CRM software for HE providers.
Transcript:
Hi, I'm Dom Yeadon founder of Student CRM, and today we're going to look at the student record card - tools and tabs.
This webinar is going to cover the student record card itself, new keyboard shortcuts, looking at applications, the likelihood ring, tools and tabs. And then, at the end, we're going to look at the future of Student Database (SDB) - where the product is going on the Roadmap.
(DOM CLICKS THROUGH THE DECK)
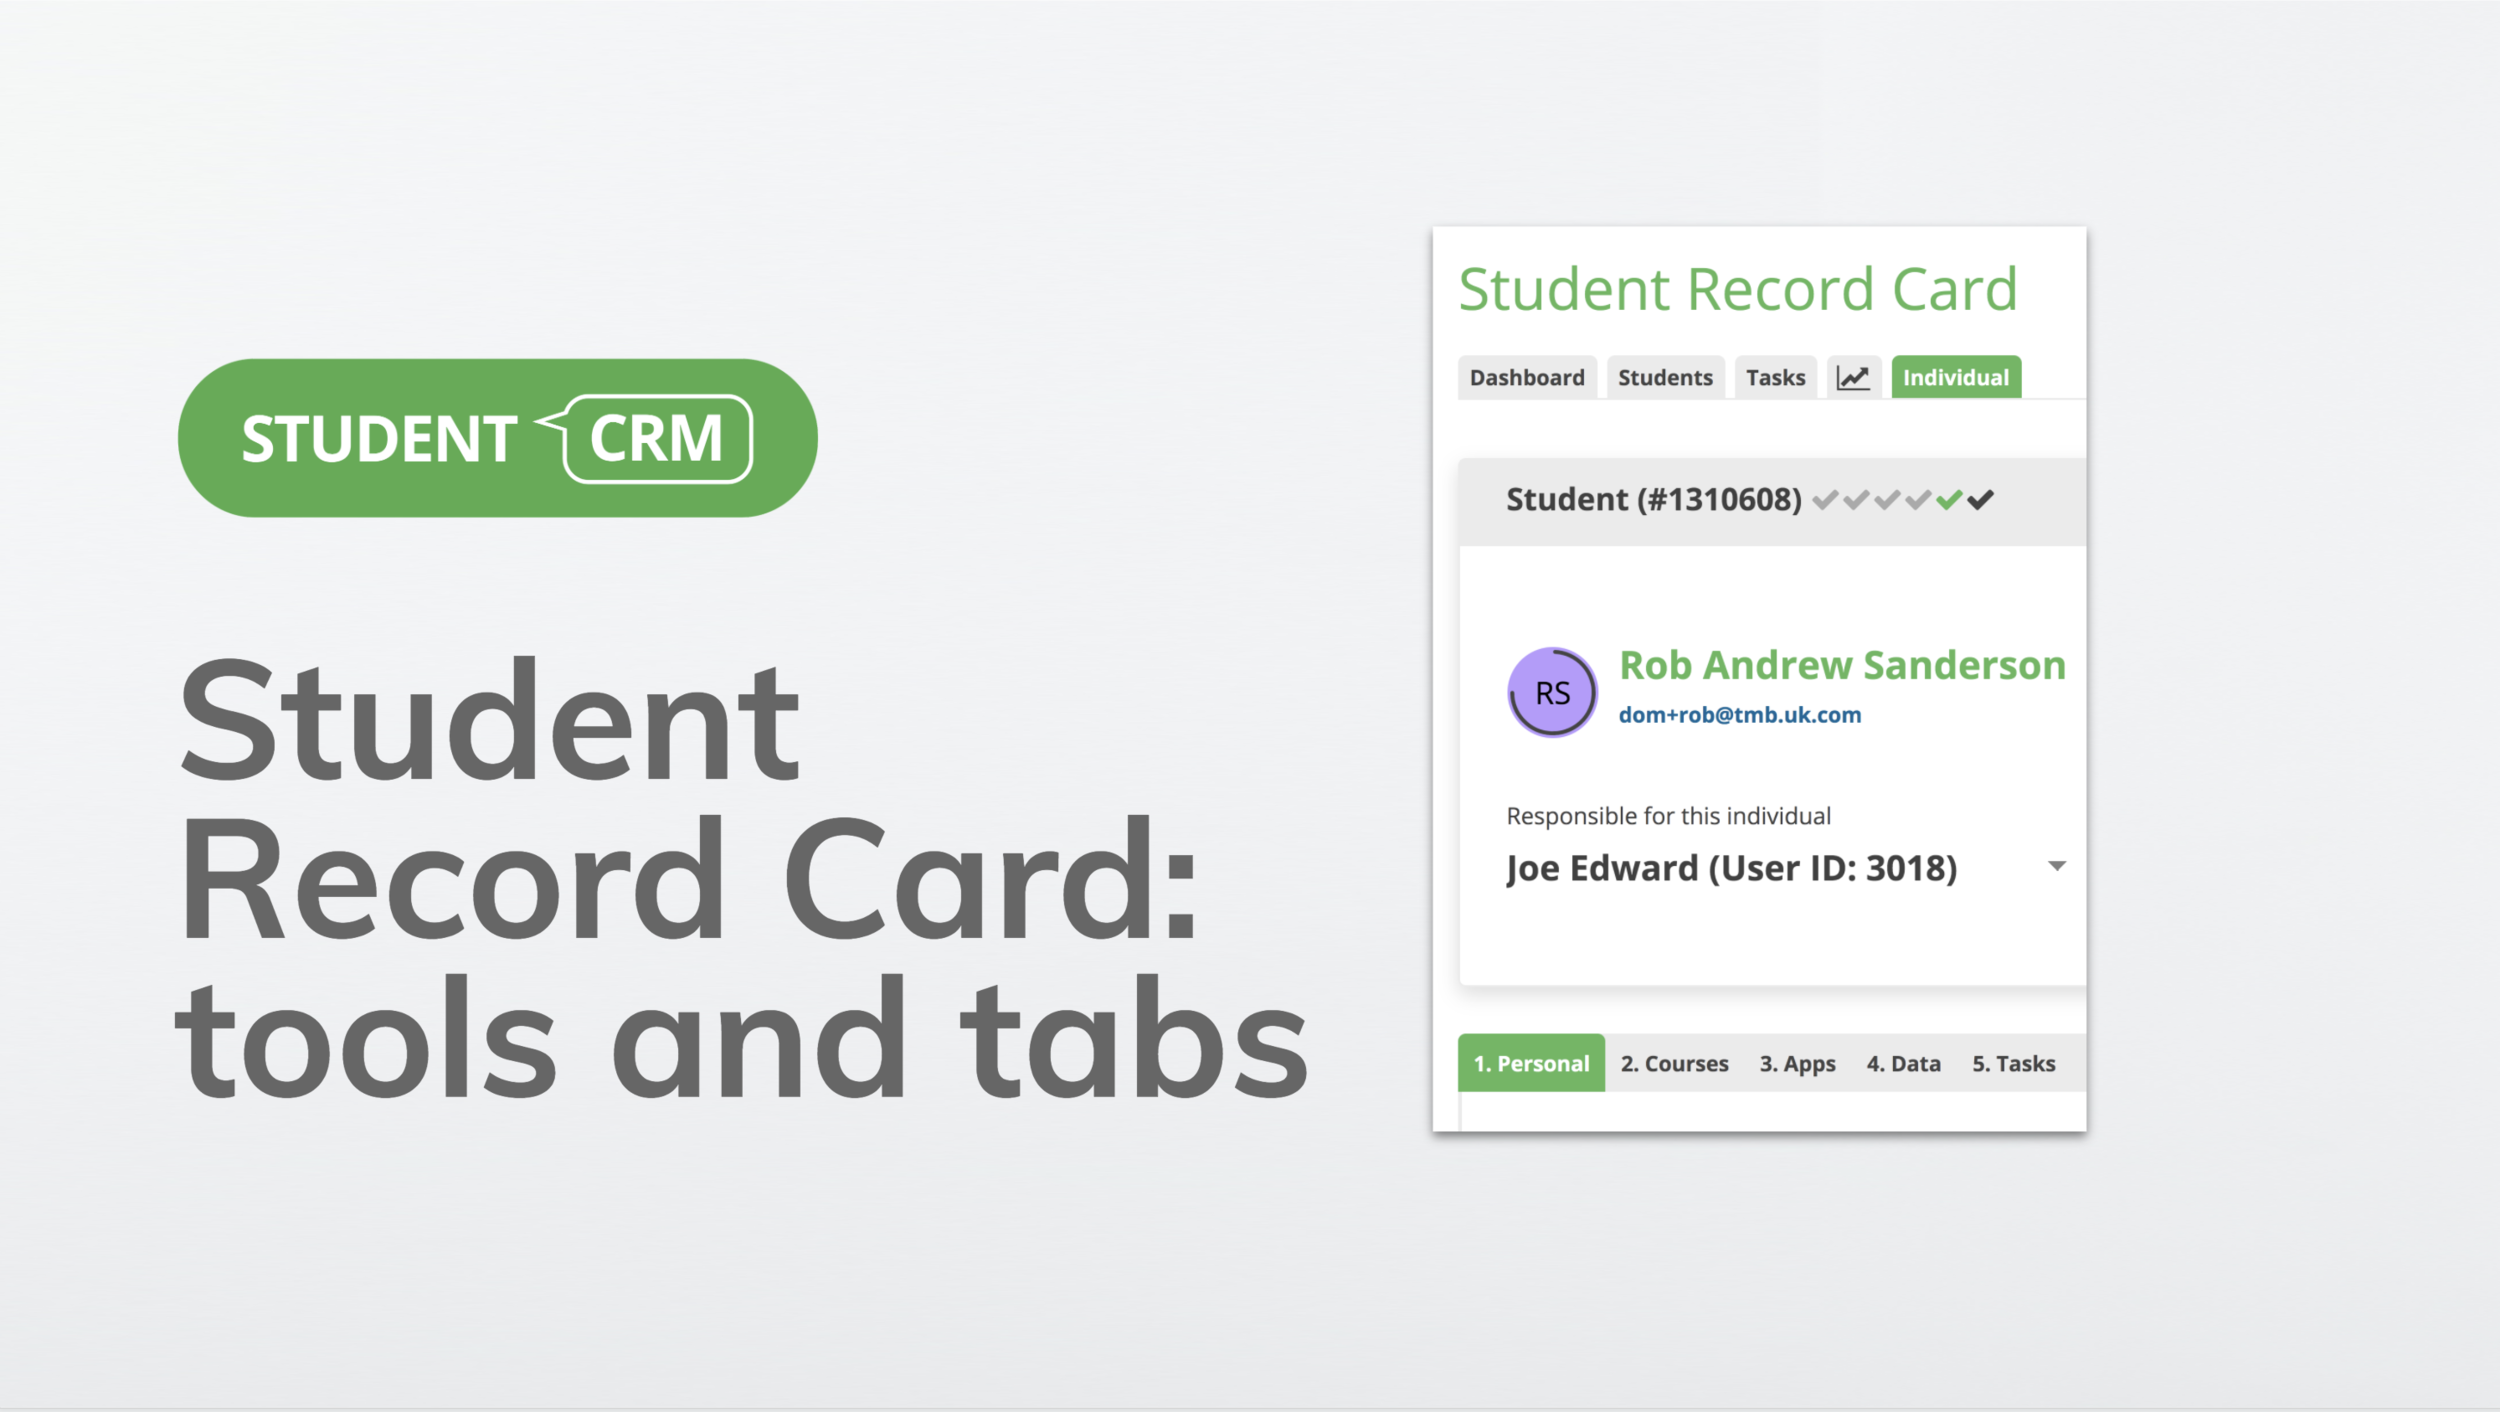
The student record card is obviously where all the information generated in all of the other apps gets centralised into one location. The student record card typically consists of some engagement bar information at the top of the record - here we have the name, persona, stage etc, and then some more information underneath. You'll see straight away that the information underneath is in tabs.
New keyboard shortcuts. As you know, I am a fan of using fingers rather than mice, if I can. So I've just highlighted the four new shortcuts. When you're in a student card, if you want to edit any of the tabs, you simply click “E” to edit.
On the right-hand side, to jump to any of the tabs, you can use the numeric keys 0 to 9, and that will jump you to the relevant tab. And down the bottom, the rolodex viewing - so when you are viewing a student or a number of students, you can use the arrow keys on your keyboard to tab left and right. And finally, we've got the “plus button” to add. So the plus button will then add a note or a task or an association. It is contextual so it will add an item depending on which tab you are in.
Let's look at the first thing in the top of the engagement card, which is applications. In the engagement bar we have the student's ID and to the right of that, you'll see a number of ticks. Each tick is an application and the different colours represent different things. So if it is a grey color, then the application is from a previous year of entry. If it is a green application, then that student has enrolled. And if it's a black or very dark grey tick, then that is for an application that is still waiting to close - so not yet enrolled in the current season.
The likelihood ring is a ring that closes around the inside of your avatar. So Rob Andrew Sanderson has an avatar, a purple avatar because he has the persona of “wise owl”, so that's what colours it. And around the inside of that ring, you can see his likelihood score at 30%. Because again, that's driven from the “stage 3 - Intends to apply”. We know this gives Rob a 30% likelihood of actually enrolling and that now creates a ring around the inside. As the likelihood creeps up, the rings go round and round until they close up with an enrollment.
In tools on the right-hand side, you've got the “more options button”. And in here we can send an email, we can send an SMS, we can add a note or a task. We can even add a course of interest. And again, as before we can send the privacy center login links, or we can reset a password. We can also add a new student, merge this student or even delete this student.
Looking across the bottom, we first have the “Personal” tab. Here we can see all the standard personal information.
The ”Courses” tab - here you can see the most recently interested course on the left and then all the history on the right-hand side.
In the “Apps” tab is all the information the student has given through the various apps that they have interacted with.
“Data” tab contains the codes, legacy codes, MIS codes, any data stuff in the left-hand panel. And then on the right we control the GDPR consents, channels and topics.
Number five, “Tasks” - tasks is one tab totally related to tasks for this record only. And you can see other officers' tasks in here, so you can see who else is working on tasks for this one student.
“Notes” are searchable. Any notes you put in are displayed here. On the right-hand side you'll see a plus icon to add a new note. And again they're searchable.
“Docs” - this lists all the docs that the student or an officer has uploaded either in Enquiries or in Applications. And you can see the source of those and jump through to look at the Application or the Enquiry.
“Associations” allows you to associate a student with another entity. So it can either be another student or an organisation in Contract Manager or an agency in Agent Manager or teachers or agents or different students. There are lots of ways you can create an association. They all get listed here.
“Logs” - this is where everything is stored. So whatever is done to the student is stored here in different log types and the filters across the top allow you to search by logs and filter by log types and even the apps that they were generated in.
“Sensitive Data”, requires a permission in your user card to view this tab. You can get permission very easily by asking your user admin, and anyone who lands on this page can click that link at the bottom and they can read how to request access to sensitive data.
This is what's in the sensitive data at the moment. It's just gender, ethnicity, disability code and death/fraud.
And in order to get access to sensitive data, you need to check that this is checked in your platform access profile. If it isn't, then simply contact one of the user admins on the right-hand side.
And of course the last tab is the All-in-one tab. Everyone should be familiar with this. It’s the classic All-in-one tab, that is still there for anyone who wishes to use the old layout.
We'll follow up at the end with the Roadmap. So the Roadmap which you can access inside from your jump menu, I've simply filtered by Student Database to have a look at all of the items to do with Student Database that we are shipping.
So some are at a hundred percent progress and some are still being shipped. That one at the bottom, of course, will move up to a hundred percent as it was shipped yesterday.
Okay, thank you. I'm now going to go into the app itself and let's have a look.
(DOM LOGS INTO STUDENT CRM TO DEMO)
We're starting on the homepage. And of course, what I'm going to do is I'm going to look at my student record called Sanderson. So I'm going to shortcut F for “Find” and I'm going to find all the Sandersons.
So again, what this does, you can see there we had some saved searches from the ones I've done before. And if I go into here, I obviously want to sort by score, find the most engaged, which is Rob Sanderson. Fantastic. I am going to click into Rob and look at his record card live.
On this record card, we've again, got the engagement bar at the top with each of those applications, which mouse over. And if I were to click those, I’d jumped to the actual application themselves. We've also got the rolodex. So you will remember that I found three Sandersons I can tab through and look at the other Sandersons. We've got a Dominic Sanderson and a Jane Sanderson. And of course, I'm going to work in Rob Andrew Sanderson. (The data that we're sharing with you, of course, is sample data from a sample university - it’s not client data.)
If we look at the likelihood ring here, we can see that it's up to 75% that's affected by the stage. I think in the demo, it was showing at “4 - Applied”, which is at 50%. “Intends to apply” is 30%. And then it goes up through the stages to the top. What we want to do is, we want to get this student up to enrolled and, of course, these can be automatically updated upon actions using Automations. So I'm moving it manually just to show you that. Of course, this is driven by processes inside Student CRM.
Now we can do quite a few things in here. This is the more options. I'm going to quickly walk you through a couple. So I can send an email. This is a one-to-one email. Okay. And this is, Hi, It’s Dom from NFU and I'm going to just start to type Hi, Rob. And then I don't really want to use an original response. So I'm going to get a saved response. This works exactly the same way as Enquiries. I know that number three is the one I want. So I just bring that saved response in and there it is. Off we go; that is now sent and logged. And we'll find that later when we look down the logs.
The next thing I'm going to do from here is I'm going to add a task. So let's add a task. And what I want to do is I want to add a task - I'm going to assign it to Laura. And I spoke with Rob and there's something we need to follow up on. So, after the weekend, which will be Monday, let's get it done by three o'clock in the afternoon.
I spoke with Rob about the status of his architectural technology application. This one up here, actually, and said we’d check and reply. Laura, could you please do that? So there I've just created a task for another user.
And finally, I'm going to add a note to the student record. So let's add a note and this is going to be a telephone call because I spoke to Robert earlier. And there's the information - he called us and wondered if we can get back to him with the information. Using the more options on the side, there's plenty of things you can now do all by staying on this card.
Let's go to tab two. And I'm just going to remind you by typing “K” that in our shortcuts, we can jump across the tabs using the 0-9 student tabs.
So I will type number 2 and we jump across to Courses.
In Courses, we've got a shortcut to add a course. And we can edit the courses. On the right-hand side, all of the pre-existing history is listed, but in this tab, if you want to add a new course of interest, you can simply do so here by following exactly the same academic selectors. I won't do this because I don't want to over-ride the latest one at the moment. But you can add a new course in and that's really useful if you're on an enquiry and the enquiry comes in through IEM and there's no course in there. So you can add a course in that way.
Next we're going to look at number three, tab three is the Apps, and this is every app that Rob Sanderson has interacted with. So he's made some bookings in Pre Applicant Open Day, and because he's our test student, he has a significant history in this particular tab. There's a lot of information there.
Tab four (Data) is where we can edit the channels; as can the student in their data privacy center. Now, again, one of the shortcuts in here is the “E” for edit. So wherever you see a pencil, you can either click on the pencil to edit the student, or you can type the shortcut “E”. By typing the shortcut, E, it turns into this mode and I'm going to turn off “Phone” because Rob asked me too; on the phone, strangely enough! Okay.
Tab five is Tasks. Task is a listing. And here you can see the tasks that we put in today. So you can search whoever created the task, who it was assigned to and the statuses of them. So you can now cancel a task as well. Statuses are quite useful. That's a new status - the cancelled one.
Number six, the Notes tab. Notes is where you can filter by any note. And again, the notes are by different types. So there's the note I've just put in just now (Rob called us). And again, you can search in Notes for anything you like.
Docs. These are the applications. I can download these straight to my desk here, or I can jump over to the application or the inquiry that they were saved in. Obviously in Applications, these are documents that the student or the agent (if using international agent portal), or the officer themselves uploads against the application.
And these are often files that are sent in as attachments uploaded in the form, so during an inquiry form, these will appear here. There's no, “Plus” here - you cannot add a document here. They have to originate elsewhere.
Tab 8 - Associations. Again, you can connect any student with any other entity in Associations. And in this case, it says here the student was introduced by Bournemouth Collegiate College. Let's jump across to Bournemouth Collegiate College. We leave the Student Database and go into Contact Manager. Here is the college and there is the relationship. So this organisation introduced the student. And again, you can jump back. So Associations allows you to add an association if you want, or to go and look at the other associations you've got.
When I look at the Logs tab, then, again, filterable by the search bar at the top. Out of 1,109 log events, I just want to find all the campaigns that this student has been involved in. This student has been involved in 60 different campaigns. And there's the record of every single one. That's quite useful to see.
In the Sensitive tab, I have been granted permission by my user admin, so I can see these. I can even edit these if I want to.
And then at the end we have the All-in-one tab and this tab contains everything stacked rather deeply and tabs at the bottom. So for those who wish to remain using the All-in-one tab, please do.
For the rest of us, I think these new tabs are fast and easy. If I want to edit this, I can edit just one particular field and save very quickly. So it's much faster to edit specific pieces of information on the student record card now.
(DOM BROWSES TO THE PRODUCT ROADMAP)
Over to the Roadmap. The Roadmap is where we publish where the product is going. So we can see here, I filtered by Student Database and these are the four things that have been shipped and there's more things coming up. As Student Database evolves, the Roadmap can be planned and seen here.
Okay, we're going to go back now to the homepage and these are all the apps we're using.
And just one final slide. This is about Student Database and it's one of the 26 apps inside Students CRM. And if you're seeing this for the first time, please do get in touch and you can request a demo. Thanks very much. Okay. This is Dom Yeadon founder of Student CRM signing off. Thanks very much.
(END)